Give Every Dollar a Job: Mastering Expense Categorization
Learn how to effectively categorize your expenses within Budget Plan to gain control of your monthly finances and achieve your savings goals.
Effective monthly budgeting starts with understanding where your money goes. Budget Plan's expense categorization feature is designed to provide clarity and control, allowing you to assign a purpose to every euro you earn. This screen is where you ensure your budget accurately reflects your spending habits and financial goals.
Understanding Your Budget Layout
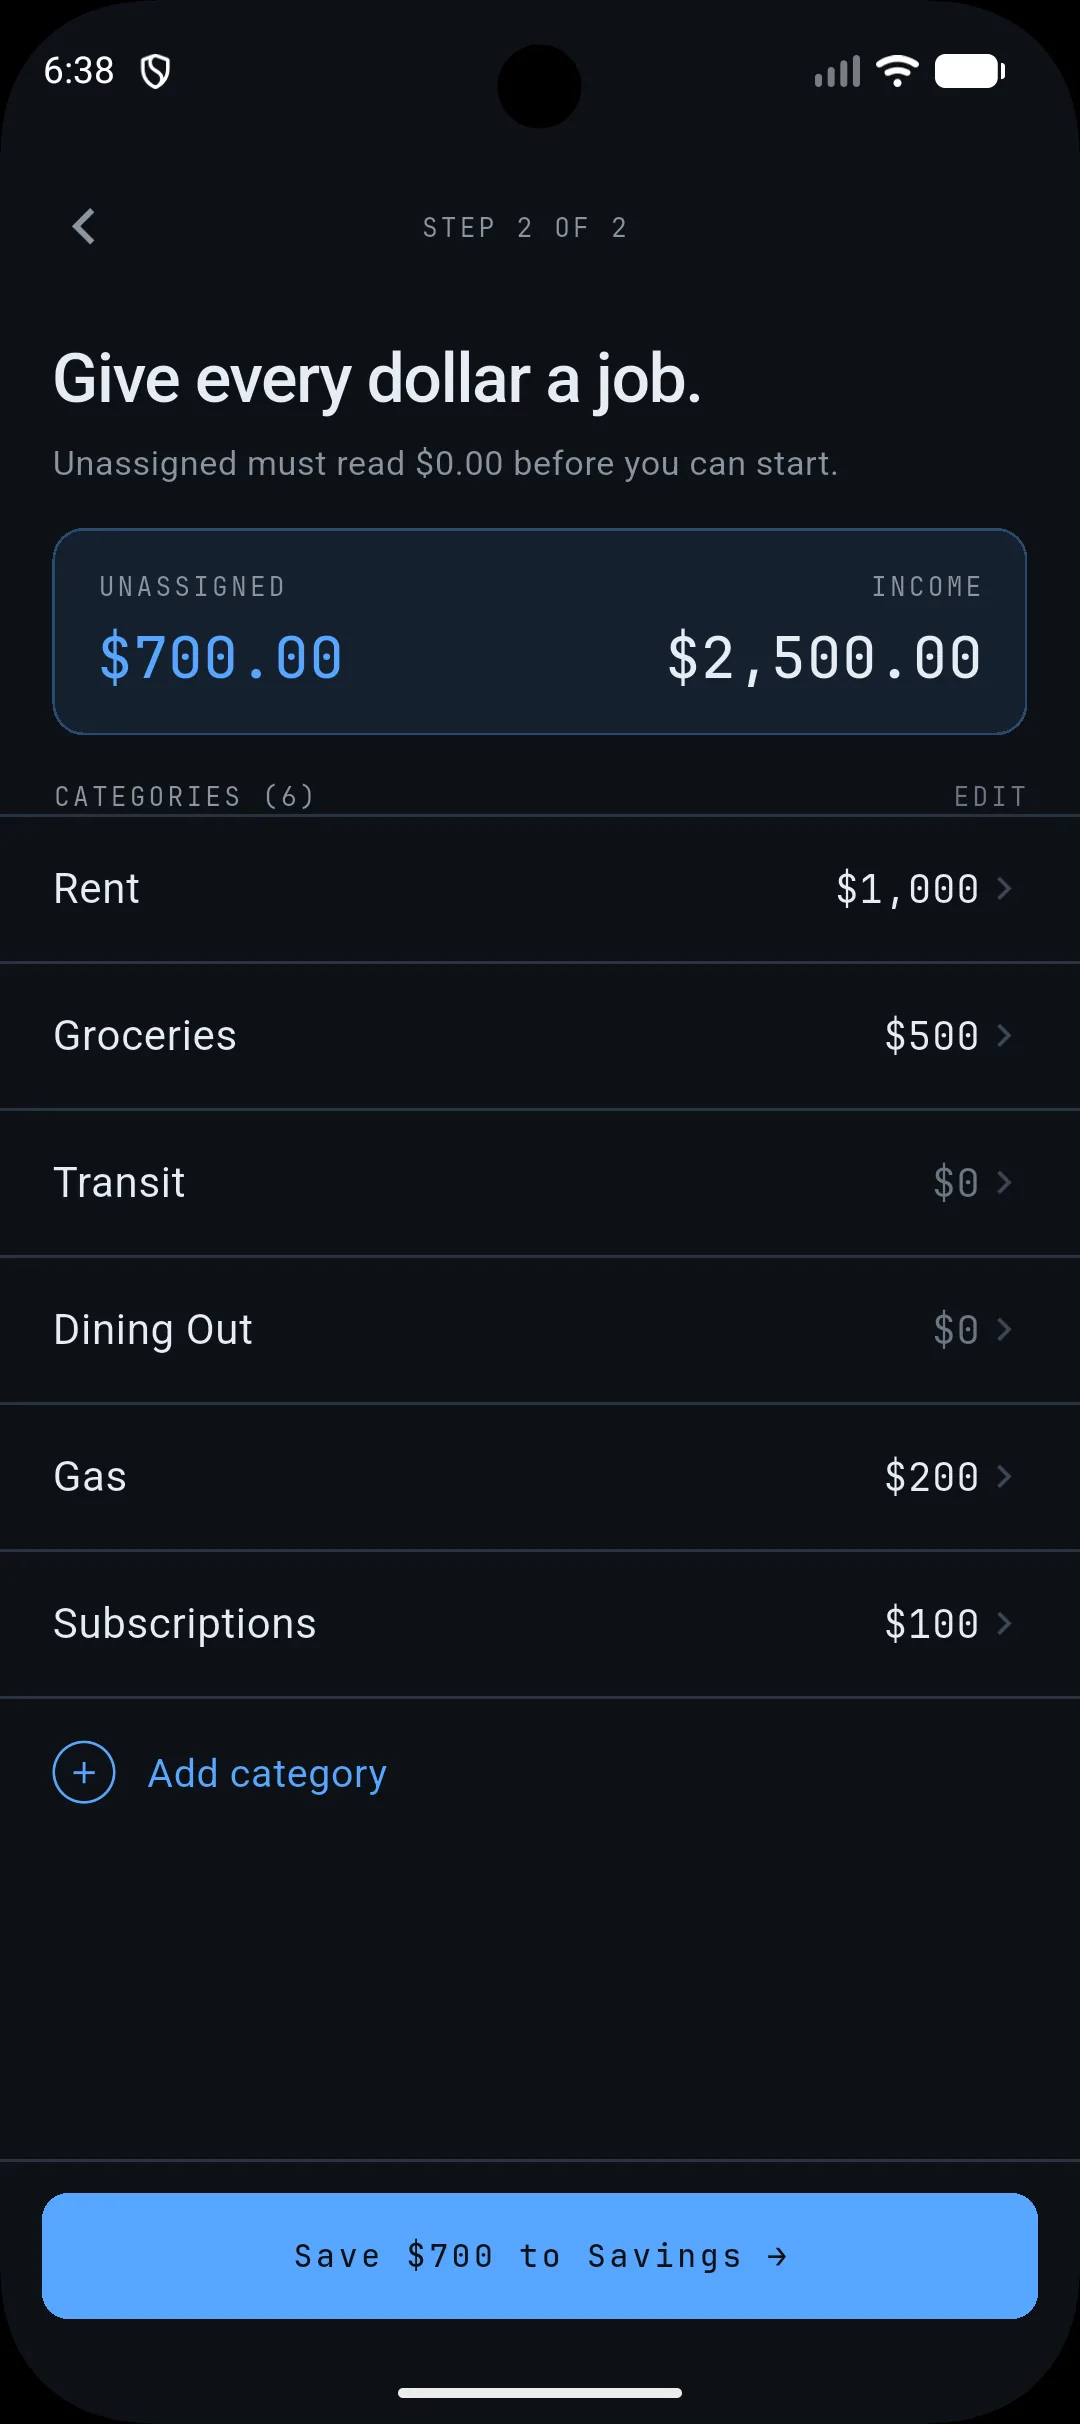
The screen you see is a crucial step in setting up your monthly budget. At the top, you have your total income, shown as $2,500.00. Below that, you'll see the "Unassigned" amount, currently $700.00. The core of this screen is your list of expense categories, such as Rent, Groceries, Transit, Dining Out, Gas, and Subscriptions, each with a designated budget amount. The goal is to allocate the entire "Unassigned" amount into these categories, ensuring that every euro of your income has a job. This process is fundamental to a zero-based budgeting approach, where your income minus your expenses and savings equals zero.
Why Categorization Matters for Your Monthly Budget
Assigning specific amounts to categories like Rent ($1,000), Groceries ($500), and Subscriptions ($100) allows you to:
* Track Spending: By setting limits for each category, you can monitor your spending in real-time and avoid overspending. For example, if you've allocated $500 for groceries and are approaching that limit, you know to be more mindful of your purchases for the rest of the month. * Identify Areas for Savings: Seeing your expenses laid out clearly can highlight areas where you might be spending more than you intended or more than is necessary. Perhaps your "Dining Out" budget is consistently exceeded, indicating an opportunity to cook more meals at home. * Plan for the Future: Understanding your typical spending patterns in each category helps you create more realistic budgets for future months and set achievable savings goals. The "Save $700 to Savings" button at the bottom suggests a direct path to allocate any remaining unassigned funds towards your financial objectives.
Taking Action: Assign Your Unassigned Funds
Your next step is to ensure the "Unassigned" amount reaches $0.00. This means reviewing your income and existing categories, and then deciding where the remaining $700.00 should go.
* Adjust Existing Categories: You might find that your initial estimates for Rent or Groceries were too low. Tap on the category to edit the budgeted amount. * Add New Categories: If you have expenses that don't fit into the current list, like "Entertainment" or "Personal Care," tap "Add category" to create a new one and assign a portion of your unassigned funds. * Allocate to Savings: As the prompt suggests, you can allocate funds directly to savings. This is a powerful way to build an emergency fund, save for a down payment, or invest for the future.
By diligently assigning every dollar, you gain a clear picture of your financial landscape, empowering you to make informed decisions and work towards your financial well-being with confidence.
Your concrete action today: Review the "Unassigned" amount on your screen and decide where those funds will be allocated. Adjust existing categories, add new ones, or assign them to savings until the unassigned balance is $0.00.